

Reference
Reference
Start with the default settings, then tune them for your model and traffic pattern.
- UI
- cURL
- Python
To configure autoscaling:
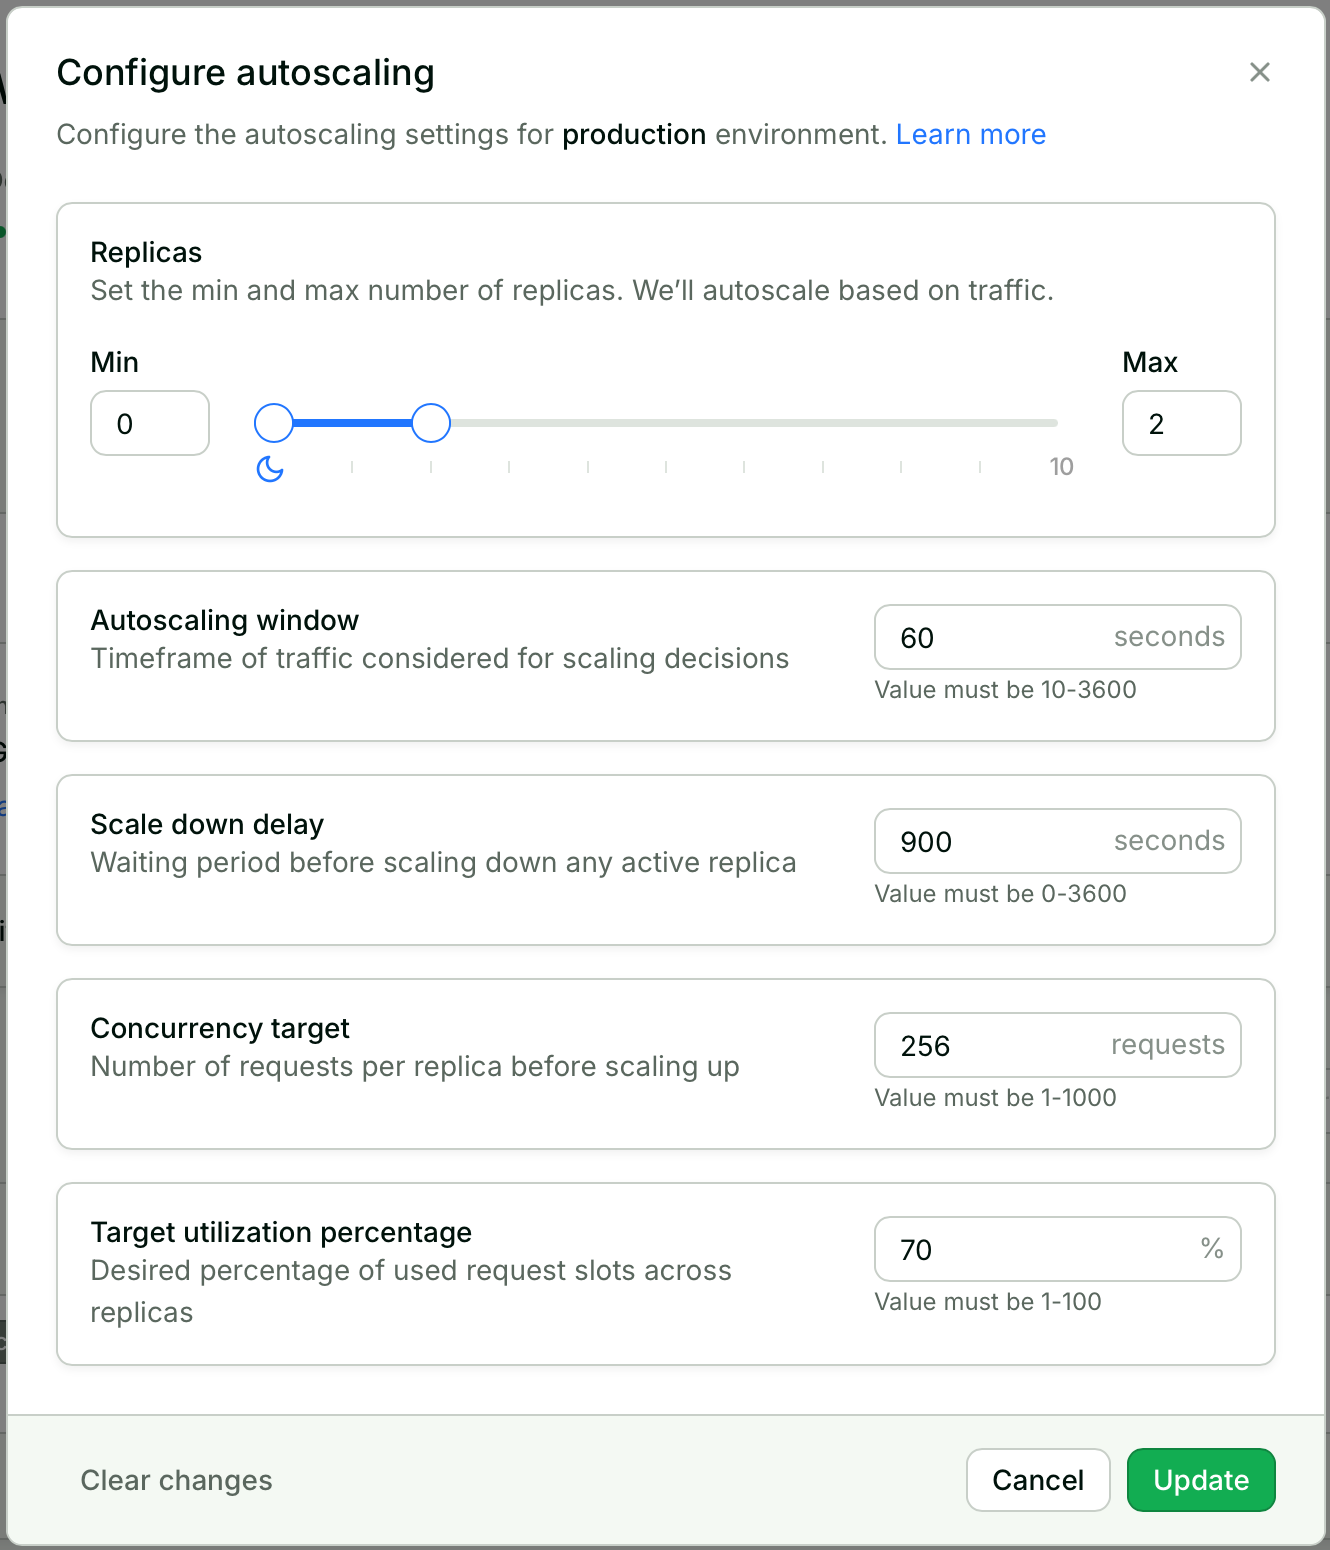
- Sign in to your workspace at app.baseten.co and choose Dedicated Inference in the sidebar, then select your model.
- Select your deployment.
- Under Replicas for your production environment, choose Configure.
- Configure the autoscaling settings.
- Choose Update.
Show the configure-autoscaling panel
Show the configure-autoscaling panel
How autoscaling works
The autoscaler averages in-flight requests overautoscaling_window (60 seconds by default). It divides that load by each replica’s effective capacity (concurrency_target × target_utilization_percentage) and rounds up to calculate the desired replica count. Scale-up begins at the next decision. Scale-down waits for scale_down_delay and removes at most max_scale_down_rate of the running replicas in each step. The slower scale-down prevents brief traffic dips from repeatedly stopping and starting replicas.
Use the simulator to see how the settings respond to different traffic patterns. Start with a scenario that demonstrates a cold start or scaling oscillation, or adjust the traffic and parameters yourself. The meters show idle capacity and queued requests.
For example, set concurrency_target to 10 and target_utilization_percentage to 70%. Each replica then has an effective capacity of 7 concurrent requests (10 × 0.70). At an average of 25 in-flight requests, the autoscaler calculates ⌈25 / 7⌉ = 4 desired replicas and starts the additional capacity. After the deployment reaches max_replica, further requests queue until capacity is available.
Compare the Desired line on the Replicas graph against your current replica count to confirm your settings produce the scale you expect.
When average load drops below the threshold, the autoscaler waits for scale_down_delay (900 seconds by default), removes replicas up to max_scale_down_rate (50% by default), and resets the timer. At the default rate, eight replicas reduce to four, then two, then one, with a full delay between steps. If traffic returns during the delay, the replicas stay active. Scale-down stops at min_replica.
Replicas
Each replica is an independent instance of the model on its own hardware. Replicas serve requests in parallel. You set the minimum and maximum replica counts, and the autoscaler adjusts capacity within those boundaries.integer
default:"0"
The floor for your deployment’s capacity. The autoscaler won’t scale below this number.Range: ≥ 0The default of 0 enables scale-to-zero: when no requests arrive for long enough, all replicas shut down and your deployment incurs no charges. The tradeoff is that the next request triggers a cold start, which can take minutes for large models. During that wake-up period, billing is per minute even though the replica isn’t yet serving responses.
For production deployments, set
min_replica to at least 2. This eliminates cold starts and provides redundancy if one replica fails.integer
default:"1"
The ceiling for your deployment’s capacity. The autoscaler won’t scale above this number.Range: ≥ 1This setting limits capacity and cost. If traffic exceeds the capacity of the maximum replicas, requests queue instead of starting more replicas. See Request lifecycle for queuing and load-shedding behavior. The default of 1 keeps the deployment at one replica regardless of load.Estimate max replicas:
Scaling triggers
The autoscaler compares in-flight requests with a per-replica threshold.concurrency_target sets how many simultaneous requests a replica accepts. target_utilization_percentage reserves headroom by triggering scale-up before replicas reach that limit. Scale-up begins when:
The following diagram shows a replica with concurrency_target of 8 and target_utilization of 50%, so the per-replica threshold sits at 4. The first four requests fill capacity within headroom; the fifth crosses the threshold, and the autoscaler provisions a second replica to absorb the overflow before the remaining slots saturate.
integer
default:"1"
How many requests each replica can handle simultaneously. This directly determines replica count for a given load.Range: ≥ 1Given the current load, the autoscaler calculates desired replicas:In-flight requests are requests sent to your model that haven’t returned a response (for streaming, until the stream completes). Async inference requests are not included in this count. This count is exposed as
baseten_concurrent_requests in the metrics dashboard and metrics export.The right value depends on how your model uses hardware. Image generation models that consume all GPU memory per request can only process one at a time, so a concurrency target of 1 is correct. LLMs and embedding models batch requests internally and can handle dozens simultaneously, so higher targets (32 or more) reduce cost by packing more work onto each replica.Higher concurrency uses fewer replicas but can increase per-replica queuing and latency. Lower concurrency uses more replicas but reduces queuing.
For engine-specific guidance, see Autoscaling engines.
Concurrency target controls requests sent to a replica and triggers autoscaling.
predict_concurrency (Truss config.yaml) controls requests processed inside the container.
Concurrency target should be less than or equal to predict_concurrency.
See the
predict_concurrency field in the Truss configuration reference for details.integer
default:"70"
Headroom before scaling triggers. The autoscaler scales when utilization reaches this percentage of the concurrency target, not when replicas are fully loaded.Range: 1-100%The effective threshold is:With a concurrency target of 10 and utilization of 70%, scaling triggers at 7 concurrent requests (10 × 0.70), leaving 30% headroom for absorbing spikes while new replicas start.Lower values (50-60%) provide more headroom for spikes but cost more. Higher values (80%+) are cost-efficient for steady traffic but absorb spikes less effectively.
Scaling dynamics
Three settings control scaling speed.autoscaling_window determines how much traffic history each decision uses. scale_down_delay keeps replicas active for a period after load drops. max_scale_down_rate limits how many replicas each scale-down step removes. The diagram shows traffic falling to zero and a replica stopping after the delay expires.
integer
default:"60"
How far back (in seconds) the autoscaler looks when measuring traffic. Traffic is averaged over this window to make scaling decisions.Range: 10-3600 secondsA 60-second window smooths out momentary spikes by averaging load over the past minute. Shorter windows (30-60s) react quickly to traffic changes, which suits bursty workloads. Longer windows (2-5 min) ignore short-lived fluctuations and prevent the autoscaler from chasing noise.
integer
default:"900"
How long (in seconds) the autoscaler waits after load drops before removing replicas.Range: 0-3600 secondsWhen load drops, the autoscaler starts a countdown. If load stays low for the full delay, it removes replicas in steps, each capped by
max_scale_down_rate, with a fresh delay between steps. If traffic returns before the countdown finishes, the replicas stay active and the countdown resets.If replicas repeatedly scale up and down, increase this value first.BIS-LLM deployments default to 300 seconds.integer
default:"50"
The maximum percentage of running replicas the autoscaler can remove in one scale-down step.Range: 1-50%Each time a
scale_down_delay elapses, the autoscaler removes at most this percentage of running replicas. The default of 50% produces the halve-and-wait pattern described above. Lower values release capacity more gradually, which keeps more replicas warm when traffic tends to rebound shortly after it drops.BIS-LLM deployments default to 20% because replicas hold KV cache that’s expensive to rebuild.Development deployments
Development deployments are designed for iteration, not production traffic. Replicas are fixed at 0-1 to match thetruss watch workflow, where you’re testing changes on a single instance rather than handling concurrent users. You can still adjust timing and concurrency settings.
To enable full autoscaling with configurable replica settings, promote the deployment to production.
Next steps
Traffic patterns
Identify your traffic pattern and get recommended starting settings.
Cold starts
Understand cold starts and how to minimize their impact.
API reference
Complete autoscaling API documentation.
Engine-specific autoscaling
Recommended settings for BEI and Engine-Builder-LLM with dynamic batching.