Build with Baseten
Baseten is a platform for deploying and serving AI models performantly,
scalably, and cost-efficiently.
 ### Inference
Serve synchronous, asynchronous, and streaming predictions with configurable execution controls. Optimize for latency, throughput, or cost depending on your application’s needs.
 ### Observability
Monitor model health and performance with real-time metrics, logs, and detailed request traces. Export data to observability tools like Datadog or Prometheus. Debug behavior with full visibility into inputs, outputs, and errors.
 This full-stack infrastructure, from packaging to observability, is powered by the **Baseten Inference Stack**: performant model runtimes, cross-cloud availability, and seamless developer workflows.
***
## Model APIs
[Model APIs](/development/model-apis/overview) offer a fast, reliable path to production for LLM-powered features. Use OpenAI-compatible endpoints to call performant open-source models like Llama 4, DeepSeek, and Qwen, with support for structured outputs and tool calling.
If your code already works with OpenAI’s SDKs, it’ll work with Baseten—no wrappers or rewrites required.
***
## Training
[Baseten Training](/training/overview) provides scalable infrastructure for running containerized training jobs. Define your code, environment, and compute resources; manage checkpoints and logs; and transition seamlessly from training to deployment.
Organize work with TrainingProjects and track reproducible runs via TrainingJobs. Baseten supports any framework, from PyTorch to custom setups, with centralized artifact and job management.
***
## Summary
* Use [Dedicated Deployments](/development/concepts) to run and scale production-grade models with full control.
* Use [Model APIs](/development/model-apis/overview) to quickly build LLM-powered features without managing infrastructure.
* Use [Training](/training/overview) to run reproducible training jobs and productionize your own models.
Each product is built on the same core: reliable infrastructure, strong developer ergonomics, and a focus on operational excellence.
# Why Baseten
Source: https://docs.baseten.co/concepts/whybaseten
Baseten delivers fast, scalable AI/ML inference with enterprise-grade security and reliability—whether in our cloud or yours.
 ## Mission-critical inference
Built for high-performance workloads, our platform optimizes inference performance across modalities, from state-of-the-art transcription to blazing-fast LLMs.
Built-in autoscaling, model performance optimizations, and deep observability tools ensure efficiency without complexity.
Trusted by top ML teams serving their products to millions of users, Baseten accelerates time to market for AI-driven products by building on four key pillars of inference: performance, infrastructure, tooling, and expertise.
#### Model performance
Baseten’s model performance engineers apply the latest research and custom engine optimizations in production, so you get low latency and high throughput out of the box.
Production-grade support for critical features, like speculative decoding and LoRA swapping, is baked into our platform.
#### Cloud-native infrastructure
[Deploy](/deployment/concepts) and [scale models](/deployment/autoscaling) across clusters, regions, and clouds with five nines reliability.
We built all the orchestration and optimized the network routing to ensure global scalability without the operational complexity.
#### Model management tooling
Love your development ecosystem, with deep [observability](/observability/metrics) and easy-to-use tools for deploying, managing, and iterating on models in production.
Quickly serve open-source and custom models, ultra-low-latency compound AI systems, and custom Docker servers in our cloud or yours.
#### Forward deployed engineering
Baseten’s expert engineers work as an extension of your team, customizing deployments for your target performance, quality, and cost-efficiency metrics.
Get hands-on support with deep inference-specific expertise and 24/7 on-call availability.
#### Model training and finetuning, all in one platform
Baseten Training provides a fast, scalable, and flexible platform for training and finetuning models. Deploy checkpoints immediately with the click of a button
to run end to end evals and seemlessly launch to prod.
# Autoscaling
Source: https://docs.baseten.co/deployment/autoscaling
Autoscaling dynamically adjusts the number of active replicas to **handle variable traffic** while minimizing idle compute costs.
 ## Configuring autoscaling
Autoscaling settings are **per deployment** and are inherited when promoting a model to production unless overridden.
Configure autoscaling through:
* **UI** → Manage settings in your Baseten workspace.
* **API** → Use the **[autoscaling API](/reference/management-api/deployments/autoscaling)**.
### Replica scaling
Each deployment scales within a configured range of replicas:
* **Minimum replicas** → The lowest number of active replicas.
* Default: `0` (scale to zero).
* Maximum value: Cannot exceed the **maximum replica count**.
* **Maximum replicas** → The upper limit of active replicas.
* Default: `1`.
* Max: `10` by default (contact support to increase).
When first deployed, the model starts with `1` replica (or the **minimum count**, if higher). As traffic increases, additional replicas **scale up** until the **maximum count** is reached. When traffic decreases, replicas **scale down** to match demand.
***
## Autoscaler settings
The **autoscaler logic** is controlled by three key parameters:
* **Autoscaling window** → Time window for traffic analysis before scaling up/down. Default: 60 seconds.
* **Scale down delay** → Time before an unused replica is removed. Default: 900 seconds (15 minutes).
* **Concurrency target** → Number of requests a replica should handle before scaling. Default: 1 request.
* **Target Utilization Percentage** → Target percentage of filled concurrency slots. Default: 70%.
A **short autoscaling window** with a **longer scale-down delay** is recommended for **fast upscaling** while maintaining capacity during temporary dips.
The **target utilization percentage** determines the amount of headroom available. A higher number means less headroom and more
usage on each replica, where a lower number means more headroom and buffer for traffic spikes.
***
## Autoscaling behavior
### Scaling up
When the **average requests per active replica** exceed the **concurrency target** within the **autoscaling window**, more replicas are created until:
* The **concurrency target is met**, or
* The **maximum replica count** is reached.
Note here that the amount of headroom is determined by the **target utilization percentage**. For example, with a concurrency target of 10 requests and a
target utilization percentage of 70%, scaling will begin when the average requests per active replica exceeds 7.
### Scaling down
When traffic drops below the **concurrency target**, excess replicas are flagged for removal. The **scale-down delay** ensures that replicas are not removed prematurely:
* If traffic **spikes again before the delay ends**, replicas remain active.
* If the **minimum replica count** is reached, no further scaling down occurs.
***
## Scale to zero
If you're just testing your model or anticipate light and inconsistent traffic, scale to zero can save you substantial amounts of money.
Scale to zero means that when a deployed model is not receiving traffic, it scales down to zero replicas. When the model is called, Baseten spins up a new instance to serve model requests.
To turn on scale to zero, just set a deployment's minimum replica count to zero. Scale to zero is enabled by default in the standard autoscaling config.
 ## Environments
[Environments](/deployment/environments) group deployments, providing stable endpoints and autoscaling to manage model release cycles. They enable structured testing, controlled rollouts, and seamless transitions between staging and production. Each environment maintains its own settings and metrics, ensuring reliable and scalable deployments.
 ## Resources
[Resources](/deployment/resources) define the hardware allocated to a model server, balancing performance and cost. Choosing the right instance type ensures efficient inference without unnecessary overhead. Resources can be set before deployment in Truss or adjusted later in the model dashboard to match workload demands.
 ## Autoscaling
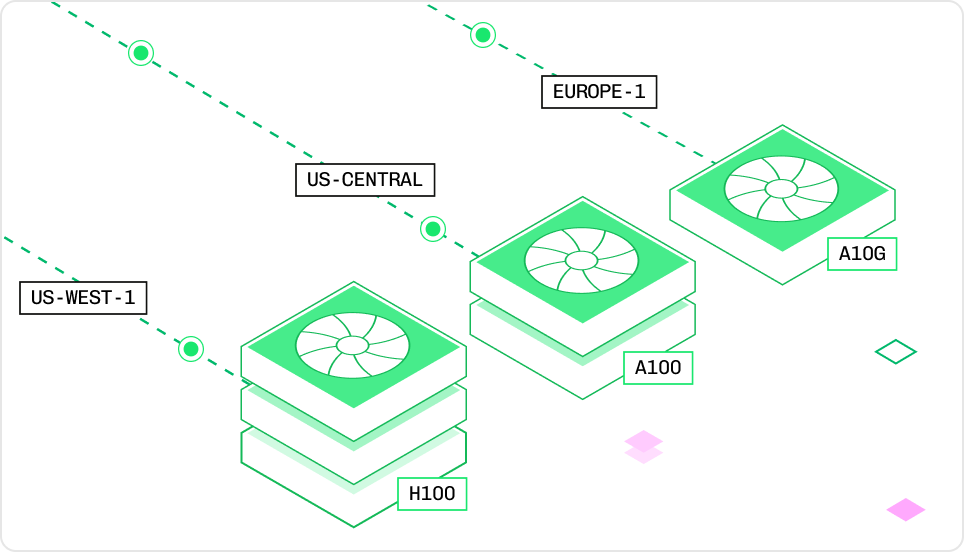
[Autoscaling](/deployment/autoscaling) dynamically adjusts model resources to handle traffic fluctuations efficiently while minimizing costs. Deployments scale between a defined range of replicas based on demand, with settings for concurrency, scaling speed, and scale-to-zero for low-traffic models. Optimizations like network acceleration and cold start pods ensure fast response times even when scaling up from zero.
 # Deployments
Source: https://docs.baseten.co/deployment/deployments
Deploy, manage, and scale machine learning models with Baseten
A **deployment** in Baseten is a **containerized instance of a model** that serves inference requests via an API endpoint. Deployments exist independently but can be **promoted to an environment** for structured access and scaling.
Every deployment is **automatically wrapped in a REST API**. Once deployed, models can be queried with a simple HTTP request:
```python theme={"system"}
import requests
resp = requests.post(
"https://model-{modelID}.api.baseten.co/deployment/[{deploymentID}]/predict",
headers={"Authorization": "Api-Key YOUR_API_KEY"},
json={'text': 'Hello my name is {MASK}'},
)
print(resp.json())
```
[Learn more about running inference on your deployment](/inference/calling-your-model)
***
# Development deployment
A **development deployment** is a mutable instance designed for rapid iteration. It is always in the **development state** and cannot be renamed or detached from it.
Key characteristics:
* **Live reload** enables direct updates without redeployment.
* **Single replica, scales to zero** when idle to conserve compute resources.
* **No autoscaling or zero-downtime updates.**
* **Can be promoted** to create a persistent deployment.
Once promoted, the development deployment transitions to a **deployment** and can optionally be promoted to an environment.
***
# Environments and promotion
Environments provide **logical isolation** for managing deployments but are **not required** for a deployment to function. A deployment can be executed independently or promoted to an environment for controlled traffic allocation and scaling.
* The **production environment** exists by default.
* **Custom environments** (e.g., staging) can be created for specific workflows.
* **Promoting a deployment does not modify its behavior**, only its routing and lifecycle management.
## Canary deployments
Canary deployments support **incremental traffic shifting** to a new deployment, mitigating risk during rollouts.
* Traffic is routed in **10 evenly distributed stages** over a configurable time window.
* Traffic only begins to shift once the new deployment reaches the min replica count of the current production model.
* Autoscaling dynamically adjusts to real-time demand.
* Canary rollouts can be enabled or canceled via the UI or [REST API](/reference/management-api/environments/update-an-environments-settings).
***
# Managing Deployments
## Naming deployments
By default, deployments of a model are named `deployment-1`, `deployment-2`, and so forth sequentially. You can instead give deployments custom names via two methods:
1. While creating the deployment, using a [command line argument in truss push](/reference/sdk/truss#deploying-a-model).
2. After creating the deployment, in the model management page within your Baseten dashboard.
Renaming deployments is purely aesthetic and does not affect model management API paths, which work via model and deployment IDs.
## Deactivating a deployment
A deployment can be deactivated to suspend inference execution while preserving configuration.
* **Remains visible in the dashboard.**
* **Consumes no compute resources** but can be reactivated anytime.
* **API requests return a 404 error while deactivated.**
For demand-driven deployments, consider [autoscaling with scale to zero](/reference/management-api/deployments/autoscaling/updates-a-deployments-autoscaling-settings).
## Deleting deployments
Deployments can be **permanently deleted**, but production deployments must be replaced before deletion.
* **Deleted deployments are purged from the dashboard** but retained in usage logs.
* **All associated compute resources are released.**
* **API requests return a 404 error post-deletion.**
 Deployments can be promoted to an environment (e.g., "staging") to validate outputs before moving to production, allowing for safer model iteration and evaluation.
***
## Using Environments to manage deployments
Environments support **structured validation** before promoting a deployment, including:
* **Automated tests and evaluations**
* **Manual testing in pre-production**
* **Gradual traffic shifts with canary deployments**
* **Shadow serving for real-world analysis**
Promoting a deployment ensures it inherits **environment-specific scaling and monitoring settings**, such as:
* **Dedicated API endpoint** → [Predict API Reference](/reference/inference-api/overview#predict-endpoints)
* **Autoscaling controls** → Scale behavior is managed per environment.
* **Traffic ramp-up** → Enable [canary rollouts](/deployment/deployments#canary-deployments).
* **Monitoring and metrics** → [Export environment metrics](/observability/export-metrics/overview).
A **production environment** operates like any other environment but has restrictions:
* **It cannot be deleted** unless the entire model is removed.
* **You cannot create additional environments named "production."**
***
## Creating custom environments
In addition to the standard **production** environment, you can create as many custom environments as needed. There are two ways to create a custom environment:
1. In the model management page on the Baseten dashboard.
2. Via the [create environment endpoint](/reference/management-api/environments/create-an-environment) in the model management API.
***
## Promoting deployments to environments
When a deployment is promoted, Baseten follows a **three-step process**:
1. A **new deployment** is created with a unique deployment ID.
2. The deployment **initializes resources** and becomes active.
3. The new deployment **replaces the existing deployment** in that environment.
* If there was **no previous deployment, default autoscaling settings** are applied.
* If a **previous deployment existed**, the new one **inherits autoscaling settings**, and the old deployment is **demoted and scales to zero**.
### Promoting a Published Deployment
If a **published deployment** (not a development deployment) is promoted:
* Its **autoscaling settings are updated** to match the environment.
* If **inactive**, it must be **activated** before promotion.
Previous deployments are **demoted but remain in the system**, retaining their **deployment ID and scaling behavior**.
***
## Deploying directly to an environment
You can **skip development stage** and deploy directly to an environment by specifying `--environment` in `truss push`:
```sh theme={"system"}
cd my_model/
truss push --environment {environment_name}
```
 ## Instance type resource components
* **Instance** → The allocated hardware for inference.
* **vCPU** → Virtual CPU cores for general computing.
* **RAM** → Memory available to the CPU.
* **GPU** → Specialized hardware for accelerated ML workloads.
* **VRAM** → Dedicated GPU memory for model execution.
***
# Configuring model resources
Resources can be defined **before deployment** in Truss or **adjusted later** via the Baseten UI.
### Defining resources in Truss
Define resource requirements in `config.yaml` before running `truss push`. Any changes after deployment will not impact previous deployments. Running `truss push` again will create a new deployment using the resources specified in the `config.yaml`.
 To build an efficient Chain, we recommend drafting your high level
structure as a flowchart or diagram. This can help you identifying
parallelizable units of work and steps that need different (model/hardware)
resources.
If one Chainlet creates many "sub-tasks" by calling other dependency
Chainlets (e.g. in a loop over partial work items),
these calls should be done as `aynscio`-tasks that run concurrently.
That way you get the most out of the parallelism that Chains offers. This
design pattern is extensively used in the
[audio transcription example](/examples/chains-audio-transcription).
 We build this Chain in a new working directory (if you are still inside
`hello_chain/`, go up one level with `cd ..` first):
```sh theme={"system"}
mkdir poetry_chain
cd poetry_chain
touch poems.py
```

 ***
## Installation
### Python
```bash theme={"system"}
pip install baseten_performance_client
```
### Node.js
```bash theme={"system"}
npm install baseten-performance-client
```
### Rust
```bash theme={"system"}
cargo add baseten_performance_client_core
```
## Getting Started
### Python
```python theme={"system"}
from baseten_performance_client import PerformanceClient
# client = PerformanceClient(base_url="https://api.baseten.co", api_key="YOUR_API_KEY")
# Also works with most third-party providers
client = PerformanceClient(
base_url="https://model-yqv4yjjq.api.baseten.co/environments/production/sync",
api_key="YOUR_API_KEY"
)
```
### Node.js
```javascript theme={"system"}
const { PerformanceClient } = require("baseten-performance-client");
// const client = new PerformanceClient("https://api.baseten.co", process.env.BASETEN_API_KEY);
// Also works with third-party providers
const client = new PerformanceClient(
"https://model-yqv4yjjq.api.baseten.co/environments/production/sync",
process.env.BASETEN_API_KEY
);
```
You can also use any **OpenAI-compatible** or **Mixedbread** endpoints by replacing the `base_url`.
## Embeddings
The client provides efficient embedding requests with configurable batching, concurrency, and latency optimizations.
### Example (Python)
```python theme={"system"}
texts = ["Hello world", "Example text", "Another sample"] * 10
response = client.embed(
input=texts,
model="my_model",
batch_size=16,
max_concurrent_requests=256,
max_chars_per_request=10000,
hedge_delay=0.5,
timeout_s=360,
total_timeout_s=600
)
# Access embedding data
numpy_array = response.numpy() # requires numpy
```
**Advanced parameters**
* `max_chars_per_request`, `batch_size`: Packs/Batches requests by number of entries or character count, whatever limit is reached first. Useful for optimial distribution across all your replicas on baseten.
* `hedge_delay`: Send duplicate requests after a delay (≥0.2s) to reduce the p99.5 latency. After hedge\_delay (s) is met, your request will be cloned once and race the original request. Limited by a 5% budget. Default: disabled.
* `timeout_s`: Timeout on each request. Raised a request.TimeoutError once a single request can't be retried. 429 and 5xx errors are always retried.
* `total_timeout_s`: Total timeout for the entire operation in seconds. Sets an upper bound on the total time for all batched requests combined.
Async usage is also supported:
```python theme={"system"}
import asyncio
async def main():
response = await client.async_embed(input=texts, model="my_model")
print(response.data)
# asyncio.run(main())
```
### Example (Node.js)
```javascript theme={"system"}
const texts = ["Hello world", "Example text", "Another sample"];
const response = await client.embed(
texts, // input
"my_model", // model
null, // encodingFormat
null, // dimensions
null, // user
32, // maxConcurrentRequests
4, // batchSize
360.0, // timeoutS
10000, // maxCharsPerRequest
0.5 // hedgeDelay
);
// Accessing embedding data
console.log(`Model used: ${response.model}`);
console.log(`Total tokens used: ${response.usage.total_tokens}`);
```
## Batch POST
Use `batch_post` for sending POST requests to any URL.
Built for benchmarks (p90/p95/p99 timings). Useful for starting off massive batch tasks, or benchmarking the performance of individual requests, while retaining a capped concurrency.
Releasing the GIL during all calls - you can do work in parallel without impacting performance.
### Example (Python) - completions/chat completions
```python theme={"system"}
# requires stream=false / non-sse response.
payloads = [
{"model": "my_model", "prompt": "Batch request 1", "stream": False},
{"model": "my_model", "prompt": "Batch request 2", "stream": False}
] * 10
response = client.batch_post(
url_path="/v1/completions",
payloads=payloads,
max_concurrent_requests=96,
timeout_s=720,
hedge_delay=30,
)
responses = response.data # array with 20 dicts
# timings = response.individual_request_times # array with the time.time() for each request
```
### Example (Node.js)
```javascript theme={"system"}
const payloads = [
{ model: "my_model", input: ["Batch request 1"] },
{ model: "my_model", input: ["Batch request 2"] },
];
const response = await client.batchPost(
"/v1/embeddings", // urlPath
payloads, // payloads
96, // maxConcurrentRequests
360.0 // timeoutS
);
```
***
## Reranking
Compatible with BEI and text-embeddings-inference.
### Example (Python)
```python theme={"system"}
response = client.rerank(
query="What is the best framework?",
texts=["Doc 1", "Doc 2", "Doc 3"],
return_text=True,
batch_size=2,
max_concurrent_requests=16
)
for res in response.data:
print(f"Index: {res.index} Score: {res.score}")
```
***
## Classification
Supports classification endpoints such as BEI or text-embeddings-inference.
### Example (Python)
```python theme={"system"}
response = client.classify(
inputs=[
"This is great!",
"I did not like it.",
"Neutral experience."
],
batch_size=2,
max_concurrent_requests=16
)
for group in response.data:
for result in group:
print(f"Label: {result.label}, Score: {result.score}")
```
***
## Error Handling
The client raises standard Python/Node.js errors:
* **HTTPError**: Authentication failures, 4xx/5xx responses.
* **Timeout**: Raised when a request or the total operation times out.
* **ValueError**: Invalid inputs (e.g., empty list, invalid batch size).
Example:
```python theme={"system"}
import requests
try:
response = client.embed(input=["Hello"], model="my_model")
except requests.exceptions.HTTPError as e:
print(f"HTTP error: {e}, status code: {e.response.status_code}")
except requests.exceptions.Timeout as e:
print(f"Timeout error: {e}")
except ValueError as e:
print(f"Input error: {e}")
```
***
## More examples, contribute to the open-source library or more detailed usage:
Check out the readme in [Github truss repo: baseten-performance-client](https://github.com/basetenlabs/truss/tree/main/baseten-performance-client)
# Private Docker Registries
Source: https://docs.baseten.co/development/model/private-registries
A guide to configuring a private container registry for your truss
Truss uses containerized environments to ensure consistent model execution across deployments. When deploying a custom base image or a custom server from a private registry, you must grant Baseten access to download that image.
## AWS Elastic Cloud Registry (ECR)
AWS supports using either [service accounts](https://docs.aws.amazon.com/IAM/latest/UserGuide/introduction.html), or [access tokens](https://docs.aws.amazon.com/AmazonECR/latest/userguide/registry_auth.html#registry-auth-token) for short lived access for container registry authentication.
### AWS IAM Service accounts
To use an IAM service account for long-lived access, you can use the `AWS_IAM` authentication method in Truss.
1. Get an AWS\_ACCESS\_KEY\_ID and AWS\_SECRET\_ACCESS\_KEY from the AWS dashboard
2. Add these as [secrets](https://app.baseten.co/settings/secrets) in Baseten. These should be named `aws_access_key_id` and `aws_secret_access_key`
respectively.
3. Choose the `AWS_IAM` authentication method when setting up your Truss. The `config.yaml` file should look something like this:
```
...
base_image:
image:
***
## Installation
### Python
```bash theme={"system"}
pip install baseten_performance_client
```
### Node.js
```bash theme={"system"}
npm install baseten-performance-client
```
### Rust
```bash theme={"system"}
cargo add baseten_performance_client_core
```
## Getting Started
### Python
```python theme={"system"}
from baseten_performance_client import PerformanceClient
# client = PerformanceClient(base_url="https://api.baseten.co", api_key="YOUR_API_KEY")
# Also works with most third-party providers
client = PerformanceClient(
base_url="https://model-yqv4yjjq.api.baseten.co/environments/production/sync",
api_key="YOUR_API_KEY"
)
```
### Node.js
```javascript theme={"system"}
const { PerformanceClient } = require("baseten-performance-client");
// const client = new PerformanceClient("https://api.baseten.co", process.env.BASETEN_API_KEY);
// Also works with third-party providers
const client = new PerformanceClient(
"https://model-yqv4yjjq.api.baseten.co/environments/production/sync",
process.env.BASETEN_API_KEY
);
```
You can also use any **OpenAI-compatible** or **Mixedbread** endpoints by replacing the `base_url`.
## Embeddings
The client provides efficient embedding requests with configurable batching, concurrency, and latency optimizations.
### Example (Python)
```python theme={"system"}
texts = ["Hello world", "Example text", "Another sample"] * 10
response = client.embed(
input=texts,
model="my_model",
batch_size=16,
max_concurrent_requests=256,
max_chars_per_request=10000,
hedge_delay=0.5,
timeout_s=360,
total_timeout_s=600
)
# Access embedding data
numpy_array = response.numpy() # requires numpy
```
**Advanced parameters**
* `max_chars_per_request`, `batch_size`: Packs/Batches requests by number of entries or character count, whatever limit is reached first. Useful for optimial distribution across all your replicas on baseten.
* `hedge_delay`: Send duplicate requests after a delay (≥0.2s) to reduce the p99.5 latency. After hedge\_delay (s) is met, your request will be cloned once and race the original request. Limited by a 5% budget. Default: disabled.
* `timeout_s`: Timeout on each request. Raised a request.TimeoutError once a single request can't be retried. 429 and 5xx errors are always retried.
* `total_timeout_s`: Total timeout for the entire operation in seconds. Sets an upper bound on the total time for all batched requests combined.
Async usage is also supported:
```python theme={"system"}
import asyncio
async def main():
response = await client.async_embed(input=texts, model="my_model")
print(response.data)
# asyncio.run(main())
```
### Example (Node.js)
```javascript theme={"system"}
const texts = ["Hello world", "Example text", "Another sample"];
const response = await client.embed(
texts, // input
"my_model", // model
null, // encodingFormat
null, // dimensions
null, // user
32, // maxConcurrentRequests
4, // batchSize
360.0, // timeoutS
10000, // maxCharsPerRequest
0.5 // hedgeDelay
);
// Accessing embedding data
console.log(`Model used: ${response.model}`);
console.log(`Total tokens used: ${response.usage.total_tokens}`);
```
## Batch POST
Use `batch_post` for sending POST requests to any URL.
Built for benchmarks (p90/p95/p99 timings). Useful for starting off massive batch tasks, or benchmarking the performance of individual requests, while retaining a capped concurrency.
Releasing the GIL during all calls - you can do work in parallel without impacting performance.
### Example (Python) - completions/chat completions
```python theme={"system"}
# requires stream=false / non-sse response.
payloads = [
{"model": "my_model", "prompt": "Batch request 1", "stream": False},
{"model": "my_model", "prompt": "Batch request 2", "stream": False}
] * 10
response = client.batch_post(
url_path="/v1/completions",
payloads=payloads,
max_concurrent_requests=96,
timeout_s=720,
hedge_delay=30,
)
responses = response.data # array with 20 dicts
# timings = response.individual_request_times # array with the time.time() for each request
```
### Example (Node.js)
```javascript theme={"system"}
const payloads = [
{ model: "my_model", input: ["Batch request 1"] },
{ model: "my_model", input: ["Batch request 2"] },
];
const response = await client.batchPost(
"/v1/embeddings", // urlPath
payloads, // payloads
96, // maxConcurrentRequests
360.0 // timeoutS
);
```
***
## Reranking
Compatible with BEI and text-embeddings-inference.
### Example (Python)
```python theme={"system"}
response = client.rerank(
query="What is the best framework?",
texts=["Doc 1", "Doc 2", "Doc 3"],
return_text=True,
batch_size=2,
max_concurrent_requests=16
)
for res in response.data:
print(f"Index: {res.index} Score: {res.score}")
```
***
## Classification
Supports classification endpoints such as BEI or text-embeddings-inference.
### Example (Python)
```python theme={"system"}
response = client.classify(
inputs=[
"This is great!",
"I did not like it.",
"Neutral experience."
],
batch_size=2,
max_concurrent_requests=16
)
for group in response.data:
for result in group:
print(f"Label: {result.label}, Score: {result.score}")
```
***
## Error Handling
The client raises standard Python/Node.js errors:
* **HTTPError**: Authentication failures, 4xx/5xx responses.
* **Timeout**: Raised when a request or the total operation times out.
* **ValueError**: Invalid inputs (e.g., empty list, invalid batch size).
Example:
```python theme={"system"}
import requests
try:
response = client.embed(input=["Hello"], model="my_model")
except requests.exceptions.HTTPError as e:
print(f"HTTP error: {e}, status code: {e.response.status_code}")
except requests.exceptions.Timeout as e:
print(f"Timeout error: {e}")
except ValueError as e:
print(f"Input error: {e}")
```
***
## More examples, contribute to the open-source library or more detailed usage:
Check out the readme in [Github truss repo: baseten-performance-client](https://github.com/basetenlabs/truss/tree/main/baseten-performance-client)
# Private Docker Registries
Source: https://docs.baseten.co/development/model/private-registries
A guide to configuring a private container registry for your truss
Truss uses containerized environments to ensure consistent model execution across deployments. When deploying a custom base image or a custom server from a private registry, you must grant Baseten access to download that image.
## AWS Elastic Cloud Registry (ECR)
AWS supports using either [service accounts](https://docs.aws.amazon.com/IAM/latest/UserGuide/introduction.html), or [access tokens](https://docs.aws.amazon.com/AmazonECR/latest/userguide/registry_auth.html#registry-auth-token) for short lived access for container registry authentication.
### AWS IAM Service accounts
To use an IAM service account for long-lived access, you can use the `AWS_IAM` authentication method in Truss.
1. Get an AWS\_ACCESS\_KEY\_ID and AWS\_SECRET\_ACCESS\_KEY from the AWS dashboard
2. Add these as [secrets](https://app.baseten.co/settings/secrets) in Baseten. These should be named `aws_access_key_id` and `aws_secret_access_key`
respectively.
3. Choose the `AWS_IAM` authentication method when setting up your Truss. The `config.yaml` file should look something like this:
```
...
base_image:
image:  The team at Baseten has additional options for sharing cached model weights across replicas - for very fast horizontal scaling.
Please contact us to enable this option.
### Deploy custom or fine-tuned models on BEI:
We support the deployment of of the below models, as well all finetuned variants of these models (same architecture & customized weights).
The following repositories are supported - this list is not exhaustive.
| Model Repository | Architecture | Function |
| ------------------------------------------------------------------------------------------------------------- | ----------------------------------- | ------------------- |
| [`Salesforce/SFR-Embedding-Mistral`](https://huggingface.co/Salesforce/SFR-Embedding-Mistral) | MistralModel | embedding |
| [`BAAI/bge-m3`](https://huggingface.co/BAAI/bge-m3) | BertModel | embedding |
| [`BAAI/bge-multilingual-gemma2`](https://huggingface.co/BAAI/bge-multilingual-gemma2) | Gemma2Model | embedding |
| [`mixedbread-ai/mxbai-embed-large-v1`](https://huggingface.co/mixedbread-ai/mxbai-embed-large-v1) | BertModel | embedding |
| [`BAAI/bge-large-en-v1.5`](https://huggingface.co/BAAI/bge-large-en-v1.5) | BertModel | embedding |
| [`allenai/Llama-3.1-Tulu-3-8B-RM`](https://huggingface.co/allenai/Llama-3.1-Tulu-3-8B-RM) | LlamaForSequenceClassification | classifier |
| [`ncbi/MedCPT-Cross-Encoder`](https://huggingface.co/ncbi/MedCPT-Cross-Encoder) | BertForSequenceClassification | reranker/classifier |
| [`SamLowe/roberta-base-go_emotions`](https://huggingface.co/SamLowe/roberta-base-go_emotions) | XLMRobertaForSequenceClassification | classifier |
| [`mixedbread/mxbai-rerank-large-v2-seq`](https://huggingface.co/michaelfeil/mxbai-rerank-large-v2-seq) | Qwen2ForSequenceClassification | reranker/classifier |
| [`BAAI/bge-en-icl`](https://huggingface.co/BAAI/bge-en-icl) | LlamaModel | embedding |
| [`BAAI/bge-reranker-v2-m3`](https://huggingface.co/BAAI/bge-reranker-v2-m3) | BertForSequenceClassification | reranker/classifier |
| [`Skywork/Skywork-Reward-Llama-3.1-8B-v0.2`](https://huggingface.co/Skywork/Skywork-Reward-Llama-3.1-8B-v0.2) | LlamaForSequenceClassification | classifier |
| [`Snowflake/snowflake-arctic-embed-l`](https://huggingface.co/Snowflake/snowflake-arctic-embed-l) | BertModel | embedding |
| [`nomic-ai/nomic-embed-code`](https://huggingface.co/nomic-ai/nomic-embed-code) | Qwen2Model | embedding |
1 measured on H100-HBM3 (bert-large-335M, for BAAI/bge-en-icl: 9ms)
2 measured on H100-HBM3 (leading model architecture on MTEB, MistralModel-7B)
# Transcribe audio with Chains
Source: https://docs.baseten.co/examples/chains-audio-transcription
Process hours of audio in seconds using efficient chunking, distributed inference, and optimized GPU resources.
 # Deploy your first model
Source: https://docs.baseten.co/examples/deploy-your-first-model
From model weights to API endpoint
This guide walks through packaging and deploying [Phi-3-mini-4k-instruct](https://huggingface.co/microsoft/Phi-3-mini-4k-instruct), a 3.8B parameter LLM, as a production-ready API endpoint.
We'll cover:
1. **Loading model weights** from Hugging Face
2. **Running inference** on a GPU
3. **Configuring dependencies and infrastructure**
4. **Iterating with live reload development**
5. **Deploying to production with autoscaling**
By the end, you’ll have an AI model running on scalable infrastructure, callable via an API.
## 1. Setup
Before you begin:
1. [Sign up](https://app.baseten.co/signup) or [sign in](https://app.baseten.co/login) to Baseten
2. Generate an [API key](https://app.baseten.co/settings/account/api_keys) and store it securely
3. Install [Truss](https://pypi.org/project/truss/), our model packaging framework
```sh theme={"system"}
pip install --upgrade truss
```
 ## Securing async inference
Since async predict results are sent to a webhook available to anyone over the internet with the endpoint, you'll want to have some verification that these results sent to the webhook are actually coming from Baseten.
We recommend leveraging webhook signatures to secure webhook payloads and ensure they are from Baseten.
This is a two-step process:
1. Create a webhook secret.
2. Validate a webhook signature sent as a header along with the webhook request payload.
## Creating webhook secrets
Webhook secrets can be generated via the [Secrets tab](https://app.baseten.co/settings/secrets).
 A webhook secret looks like:
```
whsec_AbCdEf123456GhIjKlMnOpQrStUvWxYz12345678
```
Ensure this webhook secret is saved securely. It can be viewed at any time and [rotated if necessary](/inference/async#creating-webhook-secrets) in the Secrets tab.
## Validating webhook signatures
If a webhook secret exists, Baseten will include a webhook signature in the `"X-BASETEN-SIGNATURE"` header of the webhook request so you can verify that it is coming from Baseten.
A Baseten signature header looks like:
`"X-BASETEN-SIGNATURE": "v1=signature"`
Where `signature` is an [HMAC](https://docs.python.org/3.12/library/hmac.html#module-hmac) generated using a [SHA-256](https://en.wikipedia.org/wiki/SHA-2) hash function calculated over the whole async predict result and signed using a webhook secret.
If multiple webhook secrets are active, a signature will be generated using each webhook secret. In the example below, the newer webhook secret was used to create `newsignature` and the older (soon to expire) webhook secret was used to create `oldsignature`.
`"X-BASETEN-SIGNATURE": "v1=newsignature,v1=oldsignature"`
To validate a Baseten signature, we recommend the following. A full Baseten signature validation example can be found in [this Repl](https://replit.com/@baseten-team/Baseten-Async-Inference-Starter-Code#validation.py).
 Inference on Baseten is designed for flexibility, efficiency, and scalability. Models can be served [synchronously](/inference/calling-your-model), [asynchronously](/inference/async), or with [streaming](/inference/streaming) to meet different performance and latency needs.
* [Synchronously](/inference/calling-your-model) inference is ideal for low-latency, real-time responses.
* [Asynchronously](/inference/async) inference handles long-running tasks efficiently without blocking resources.
* [Streaming](/inference/streaming) inference delivers partial results as they become available for faster response times.
Baseten supports various input and output formats, including structured data, binary files, and function calls, making it adaptable to different workloads.
# Function calling (tool use)
Source: https://docs.baseten.co/inference/function-calling
Use an LLM to select amongst provided tools
 ## Inference volume
Tracks the request rate over time, segmented by HTTP status codes:
* `2xx`: 🟢 Successful requests
* `4xx`: 🟡 Client errors
* `5xx`: 🔴 Server errors (includes model prediction exceptions)